
Table of Contents
- Tools You'll Need to Measure Car Windows
- How to Measure Car Windows for Shades
- Identifying Window Frame Obstacles
- Rounding Measurements to the Nearest 1/8 Inch
- Creating Templates for Custom Fit Covers
- Best Car Sun Shades for Summer Heat Protection
- How to Make DIY Car Window Covers
- Common Mistakes to Avoid When Measuring
Last Updated: August 22, 2026
According to automotive accessory specialists, precision is everything when measuring car windows for shades. A gap of just 1/8 inch can mean the difference between a custom-fit cover that blocks heat effectively and one that leaves your interior vulnerable to UV damage (the CDC). This guide from 4GodsYourGlory walks you through the exact process, from selecting the right tools to accounting for tapered edges and window frame obstacles, so you can measure car windows accurately the first time.
Tools You'll Need to Measure Car Windows
A steel measuring tape is your primary instrument, it resists stretching and provides consistent accuracy. Cloth tapes can sag or compress, introducing errors with tight tolerances. Gather foam board or rigid cardboard for templates, a marker for tracing, and a notepad for recording dimensions. A carpenter's square helps identify right angles and frame geometry. For complex window shapes with curved edges or irregular trim, a flexible ruler or contour gauge captures the exact profile precisely.
How to Measure Car Windows for Shades
Measuring Width at Three Points
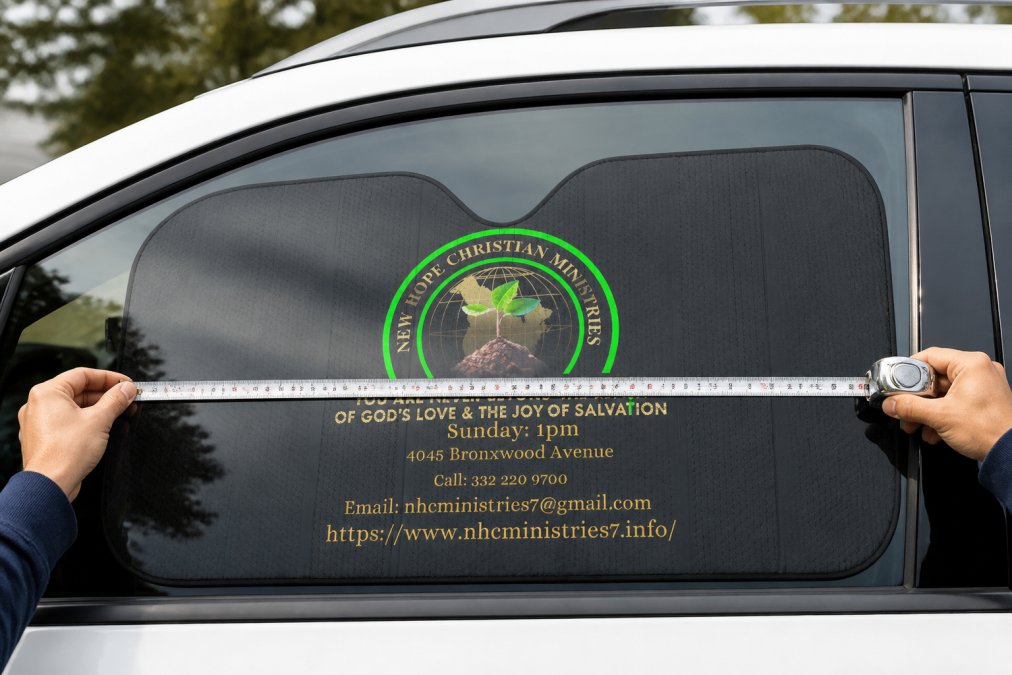
The most common mistake is taking only one width measurement. Window openings taper, angle inward, or have uneven trim. Measure the width at three distinct points: top, middle, and bottom of the window opening, recording to the nearest 1/8 inch (nist.gov).
Start by extending your steel measuring tape horizontally across the top edge. Move to the exact center and measure again, this is often the widest point. Finally, measure the bottom edge. Use the largest measurement as your primary width dimension, since your shade needs to cover the full opening without gaps. Position the tape perpendicular to the window frame and press it firmly against the glass or frame edge to eliminate slack. If the window has protruding trim, measure from the outermost edge, not from the glass itself.
Measuring Height and Depth
Height measurement follows the same logic: take readings at the left, center, and right positions to account for windows that angle inward. Measure vertically from the top edge to the bottom, recording to the nearest 1/8 inch at each position.
Depth, the distance from the window glass to the mounting surface, matters significantly for shades. For inside-mount shades, measure from the glass surface to the back wall of the window frame. For outside-mount applications, measure from the glass to any obstacles behind the window. Pay attention to depth variations, as recessed areas or mounting flanges reduce available space.
Accounting for Tapered Edges and Window Trim
Car windows almost never have perfectly parallel edges. Most taper inward slightly from bottom to top. Use the largest measurement from your three-point survey to prevent gaps. If the top is 24 inches wide and the bottom is 23.75 inches, your shade should be designed for 24 inches.
Window trim and molding add complexity. Measure around obstacles, not across them. If trim blocks your measurement path, measure the clear opening on either side and add those measurements together. Document the location and dimensions of any trim so you can plan around it when creating your template.
Identifying Window Frame Obstacles
Conduct a thorough inspection of the entire window frame and surrounding area. Common obstacles include door handles, window switches, speaker grilles, and grab handles. Check for protruding dashboard elements behind the window like instrument clusters, air vents, and steering columns. On the sides, look for door frame reinforcements. On the bottom, identify any mounted equipment like backup camera displays or sensor modules.
Mark the location of these obstacles on your notepad. When you create your template, you'll need to cut around them or adjust shade dimensions to maintain clearance.
Rounding Measurements to the Nearest 1/8 Inch
Always round up to the nearest 1/8 inch when your measurement falls between increments. If your width measurement is 23 and 3/16 inches, round up to 23.25 inches. This ensures your shade will fit without gaps. The 1/8 inch increment is the standard tolerance for automotive accessories (sae.org).
When you have multiple measurements at different points, round each one independently, then compare the rounded values to determine your final dimensions. This approach respects actual variation in your window geometry rather than averaging measurements.
Creating Templates for Custom Fit Covers
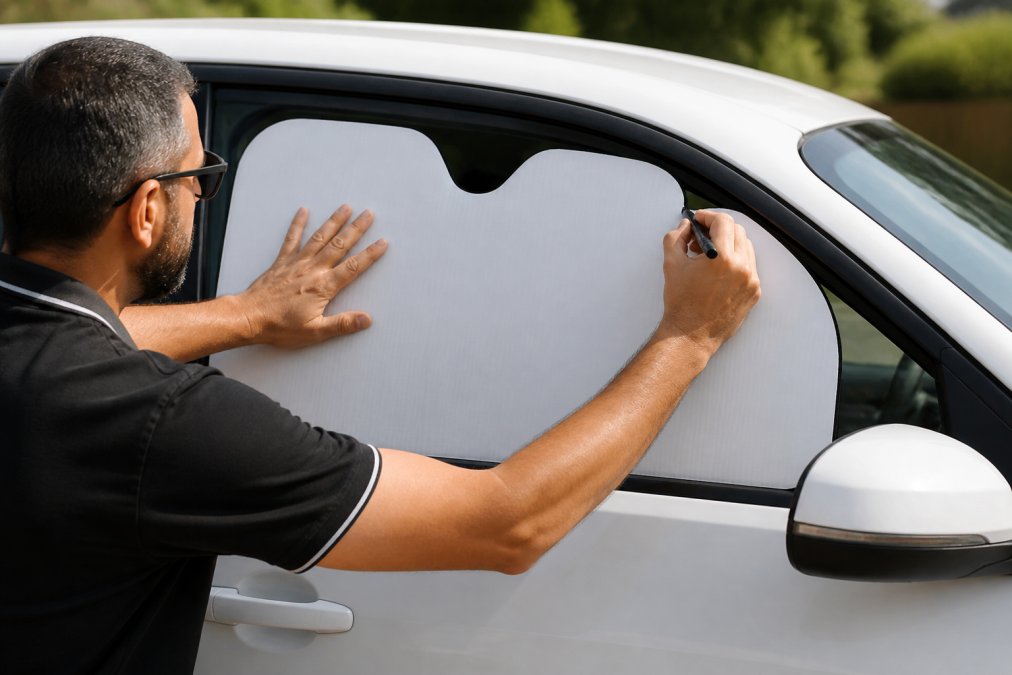
Templates are your safeguard against measurement errors. Start with foam board and cut a rough template slightly larger than your window opening. Position it against the window and trace the exact outline with a marker. Mark the locations of any obstacles: trim, handles, speakers, or mounting points. Label the top and bottom so you install it correctly.
Once traced, cut the template to match the line. Test fit it in the window opening, it should slide in smoothly without binding. If it catches, trim further and retest. When the template fits perfectly, you've captured the exact geometry of your window. Transfer this template to your final shade material by laying it on top and tracing around it.
Best Car Sun Shades for Summer Heat Protection
When you've completed your measurements, you're ready to select or create shades that match your window geometry precisely. 4GodsYourGlory offers high-quality auto sun shades designed for exact fit and maximum heat protection. Their Auto Sun Shades feature double-insulated laminate material that blocks UV rays and reduces interior heat while maintaining a clean appearance.

Accurate measurement directly impacts protection. A properly fitted shade creates a thermal barrier that can reduce interior temperatures by 10-15 degrees on hot days. When evaluating sun shades, look for materials that offer both UV blocking and thermal insulation. 4GodsYourGlory's double-insulated design maximizes protection while remaining compact for storage.
How to Make DIY Car Window Covers
Start with your template as your foundation. Transfer the template outline to your chosen material: vinyl, reflective fabric, foam-backed cloth, or heavy-duty cardboard for temporary covers. Cut carefully, staying just inside your traced line to prevent oversizing. For fabric materials, seal the edges with fabric glue or heat sealing to prevent fraying.
Test fit your DIY cover before finalizing it. Slide it into the window opening and check for binding on trim or obstacles. Verify that it blocks light as intended. For durability, reinforce high-stress areas where the cover attaches to the window frame. Fabric covers benefit from reinforced grommets or edge binding. Vinyl covers should have secure attachment points that distribute stress evenly.
Common Mistakes to Avoid When Measuring
The most frequent error is measuring only one point across the width or height. This misses taper variation, resulting in gaps or an oversized shade that won't fit properly.
Another common mistake is measuring from the wrong reference point. Measure from the outermost edge of the window frame or trim, not from the glass itself. Failing to account for window obstacles causes problems during installation. Always inspect the full frame and surrounding area before finalizing dimensions.
Rounding inconsistently introduces errors that compound. Always round to the nearest 1/8 inch, and always round up. Neglecting to create and test a template is a costly shortcut, it catches measurement errors before you cut expensive shade material.
Not recording measurement locations clearly causes confusion later. Write down exactly where each measurement was taken: top/center/bottom for width and height, left/center/right for depth. Include notes about obstacles and frame features.
| Measurement Point | What to Record | Why It Matters |
|---|---|---|
| Width (top, center, bottom) | Exact dimension to 1/8 inch | Identifies taper and ensures full coverage |
| Height (left, center, right) | Exact dimension to 1/8 inch | Reveals vertical variation and fit issues |
| Depth | Distance from glass to mounting surface | Determines shade mechanism clearance |
| Obstacle locations | Position and dimensions | Prevents interference during installation |
| Frame features | Trim, molding, protruding elements | Guides template creation and cutting |
Measuring car windows for shades accurately transforms the installation process from guesswork into precision work. The techniques covered here, measuring at multiple points, accounting for tapered edges, identifying obstacles, and creating templates, work for every vehicle and shade type. When you install a properly fitted shade, you're protecting your vehicle's interior from UV damage while improving comfort and reducing heat buildup. Start with quality measuring tools and a methodical approach, and your DIY or custom shade project will deliver professional results. 4GodsYourGlory's auto sun shades are designed for exact fit, making them an excellent choice once your measurements are complete. Get started with Auto Sun Shades and experience the difference that precision-fit protection makes during summer heat.
Frequently Asked Questions
What tools do I need to measure car windows accurately?
A steel measuring tape is essential for precision, cloth tapes can stretch and give inaccurate readings. You'll also need a notepad to record measurements, a marker for marking reference points, and optionally foam board or cardboard for creating templates. A standard 25-foot steel tape handles most car window measuring tasks effectively.
How do I measure car windows to ensure my shades fit perfectly?
Measure width at three points: top, middle, and bottom of the window. Use the widest measurement as your reference. For height, measure from the top of the window frame to the bottom, accounting for any tapered edges. Record all measurements to the nearest 1/8 inch. Check for obstacles like trim or handles that might affect shade placement, and verify whether you need an inside mount or outside mount based on your window geometry.
Do I need to account for window trim when measuring for car shades?
Yes, window trim is critical. Measure the actual glass opening, not the trim itself. If trim protrudes beyond the glass, you may need to adjust your mounting surface or choose a shade designed for outside mount installation. Tapered windows, common in many vehicles, require you to measure at the widest point and account for the slope when ordering. Check your vehicle's specific geometry before finalizing measurements.
How do I create a template for DIY car window covers?
Use foam board or sturdy cardboard to trace your window outline. Position the template against the window and trace the exact shape with a marker, including any curves or tapered edges. Mark reference points for mounting obstacles. Once traced, cut out the template and test-fit it in your window to verify accuracy before cutting fabric or material. Templates help ensure custom fit covers align perfectly with your window geometry.
This article was written using GrandRanker